Outlook Connection Settings
This page shows how to set up Outlook to properly send and receive mail if you are using MAI Computing hosting
Select your Outlook version
Outlook 2013, 2016, or 2019
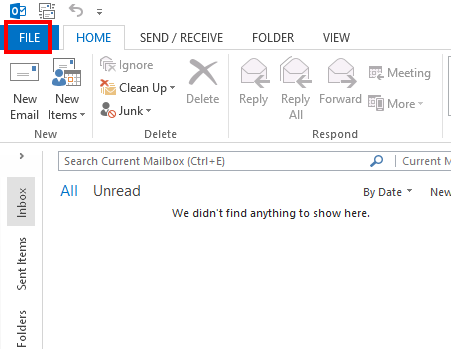
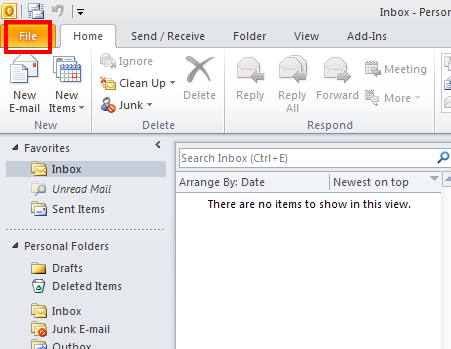
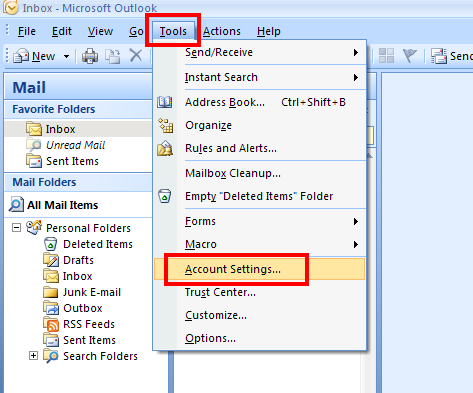
- Click on the File tab
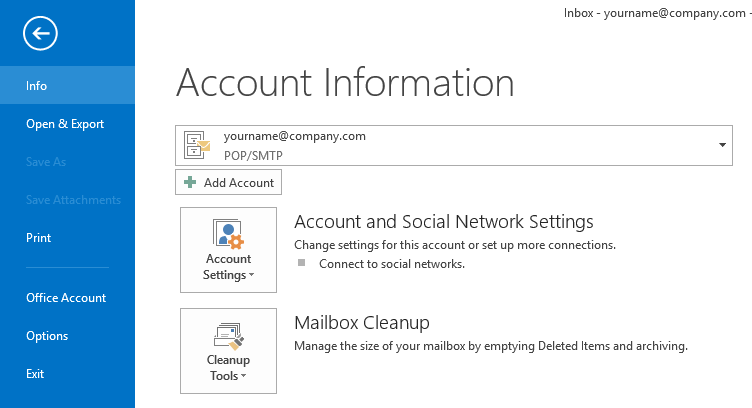
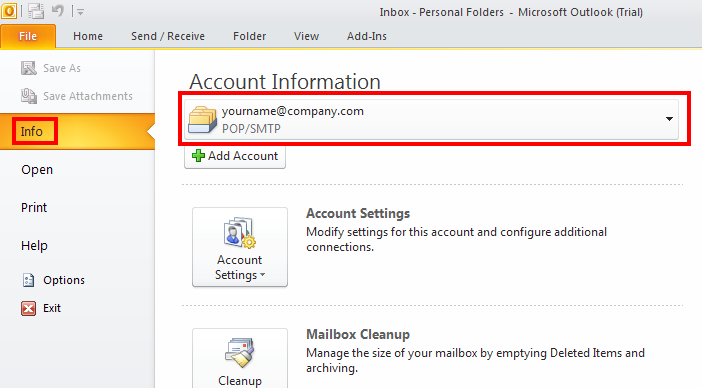
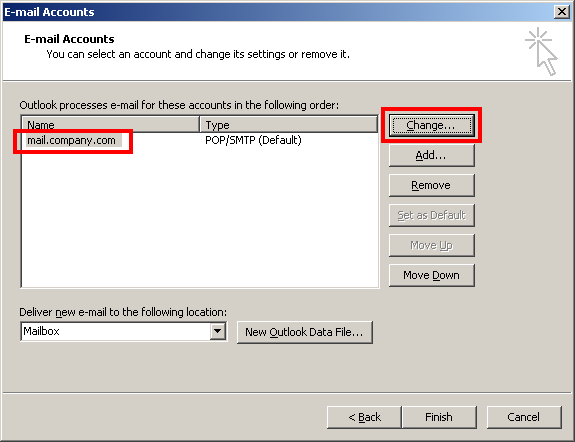
- Make sure the section is active and your e-mail account is selected.
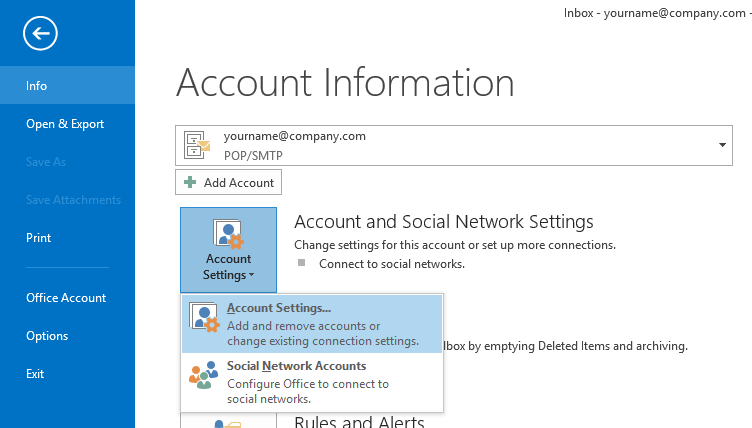
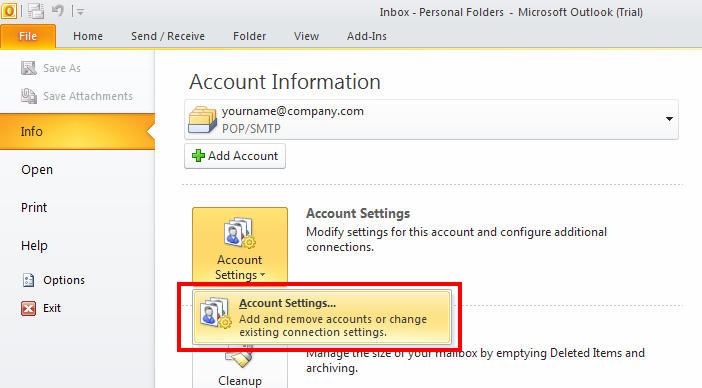
- Click on the button and choose
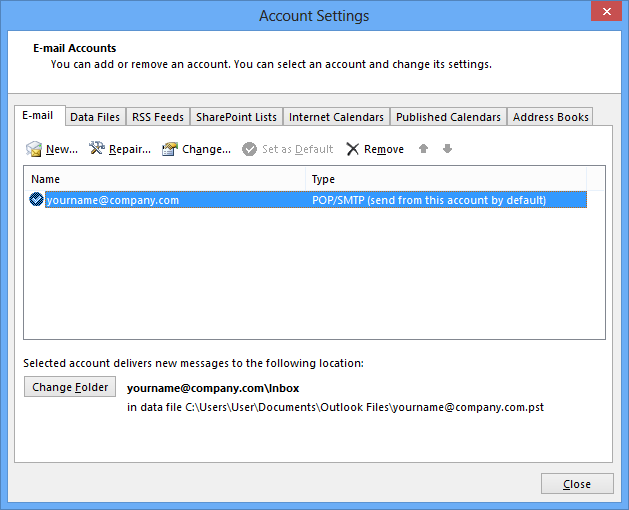
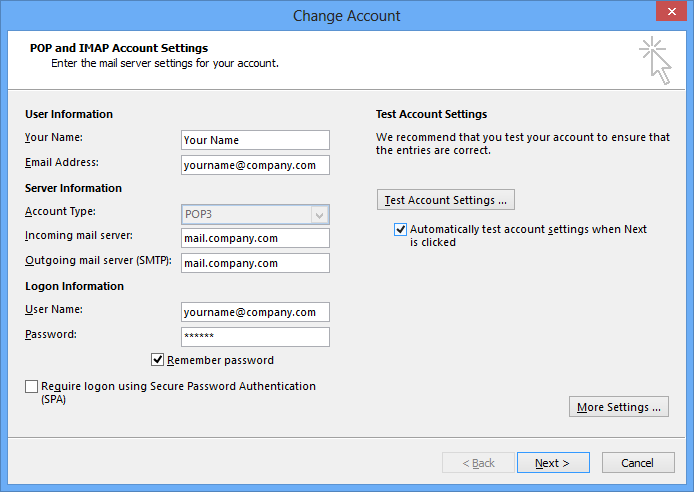
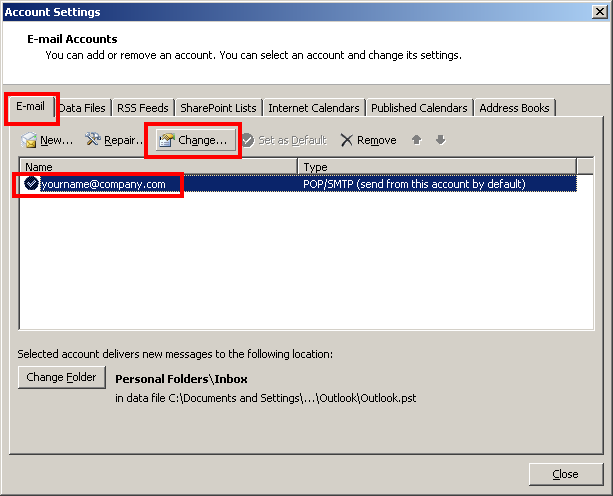
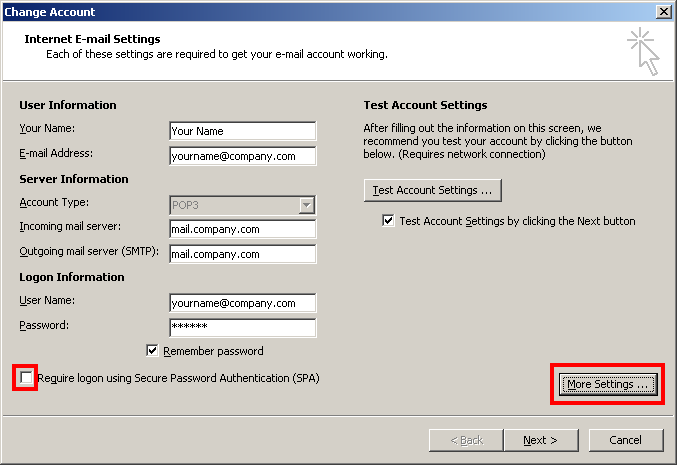
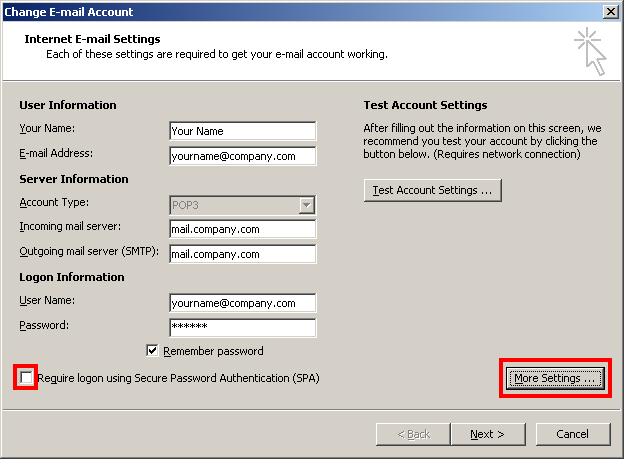
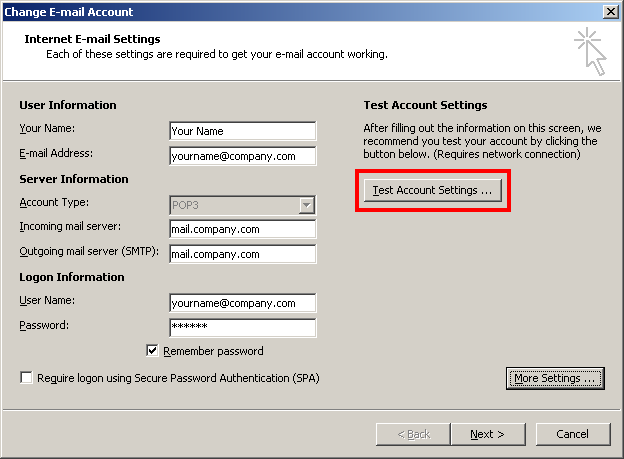
- Make sure you are on the E-mail tab.
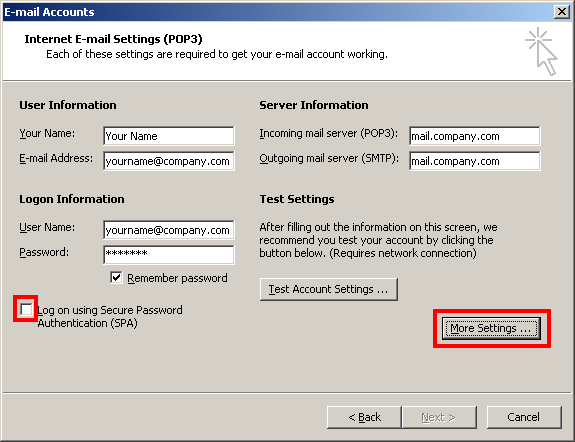
Select your account name then click on the button, or click if one doesn't exist - Require logon using Secure Password Authentication (SPA) should be unchecked
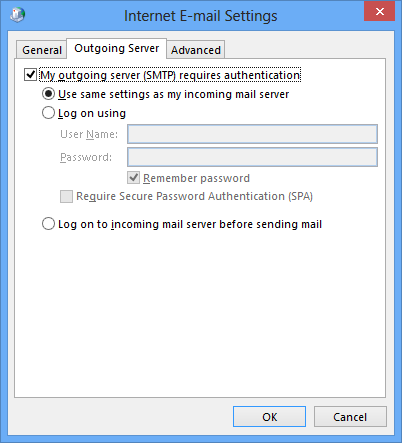
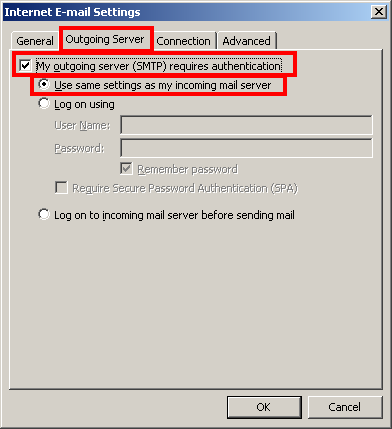
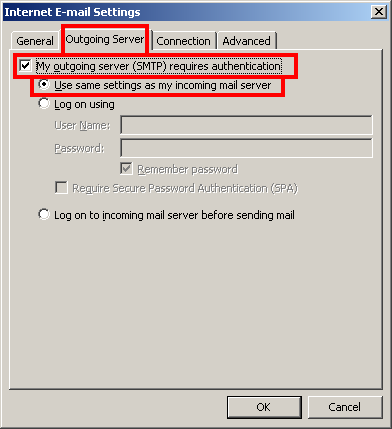
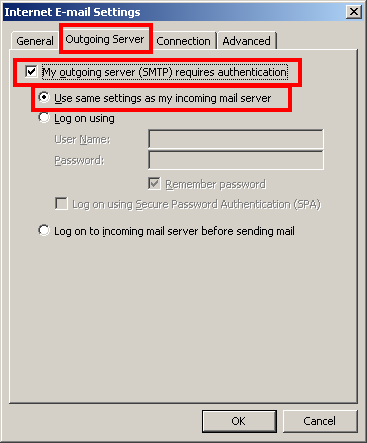
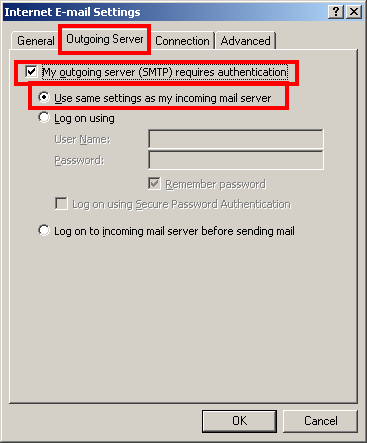
Click the button. - Select the Outgoing Server tab.
- My outgoing server (SMTP) requires authentication should be checked
- Use same settings as my incoming mail server should be filled
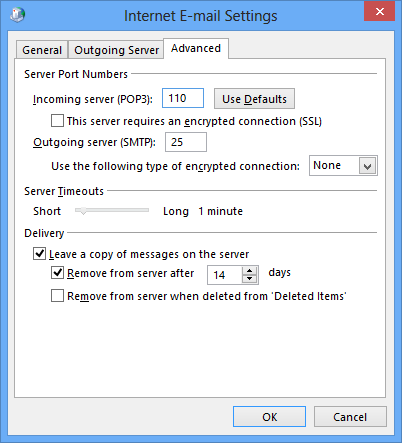
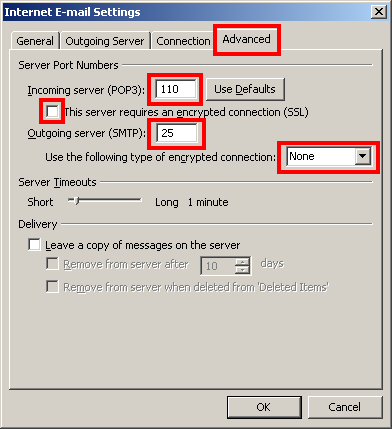
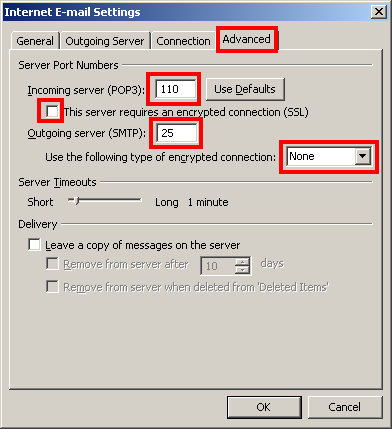
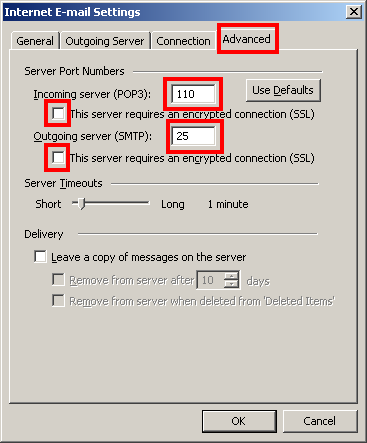
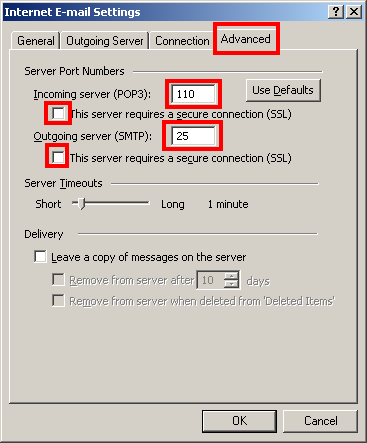
- Select the Advanced tab.
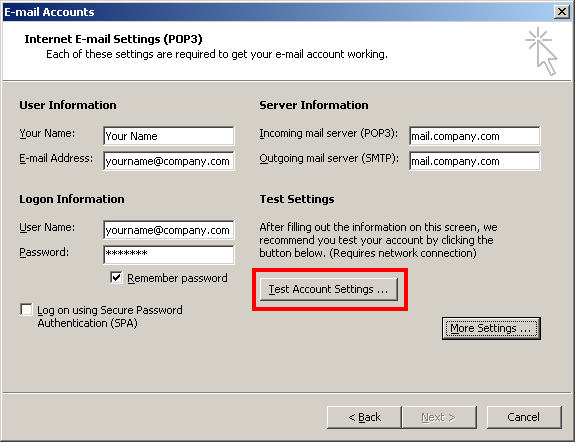
- Incoming server (POP3) port number should be 110
- This server requires an encrypted connection (SSL) should be unchecked
- Outgoing server (SMTP) port number should be 25
- Use the following type of encrypted connection should be None
- Click to close out of the Internet E-mail Settings dialog
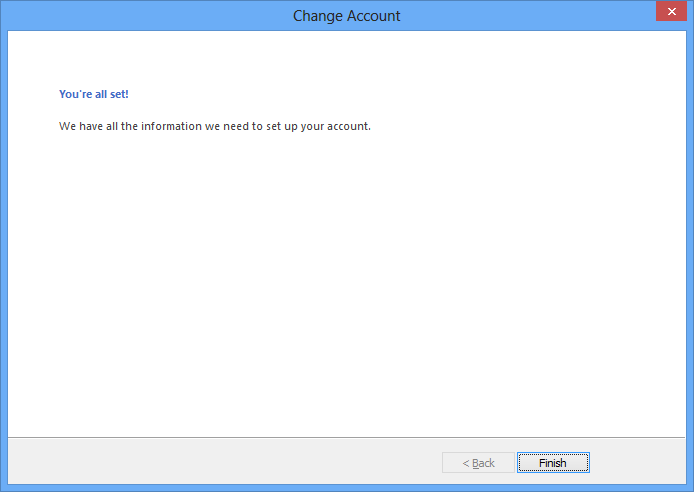
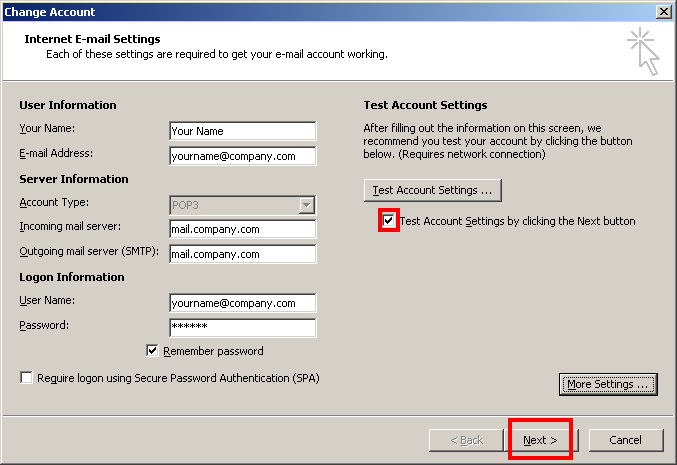
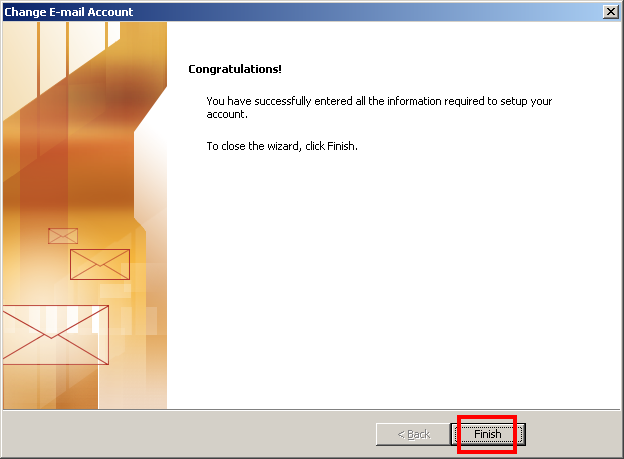
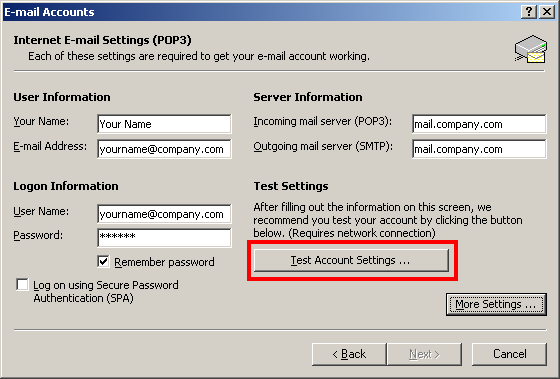
Click the button in the Change Account dialog to automatically test account settings. - If there was no error and you can send and receive mail, you are done.
Click to complete the changes.

If there is still a problem, contact us and we will assist you in solving the issue.
Outlook 2010
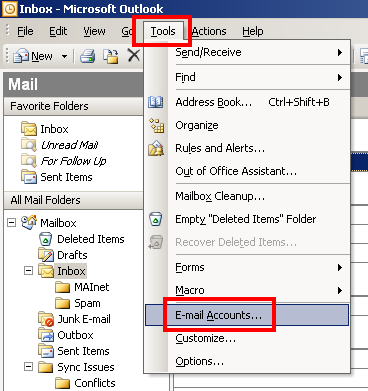
- Click on the File tab
- Make sure the section is active and your e-mail account is selected.
- Click on the button and choose
- Make sure you are on the E-mail tab.
Select your account name then click on the button, or click if one doesn't exist - Require logon using Secure Password Authentication (SPA) should be unchecked
Click the button. - Select the Outgoing Server tab.
- My outgoing server (SMTP) requires authentication should be checked
- Use same settings as my incoming mail server should be filled
- Select the Advanced tab.
- Incoming server (POP3) port number should be 110
- This server requires an encrypted connection (SSL) should be unchecked
- Outgoing server (SMTP) port number should be 25
- Use the following type of encrypted connection should be None
- Click to close out of the Internet E-mail Settings dialog
Click the button in the Change Account dialog to automatically test account settings. - If there was no error and you can send and receive mail, you are done.
Click to complete the changes.

If there is still a problem, contact us and we will assist you in solving the issue.
Outlook 2007
- Go to the menu and select
- Make sure you are on the E-mail tab.
Select your account name then click on the button - Require logon using Secure Password Authentication (SPA) should be unchecked
Click the button. - Select the Outgoing Server tab.
- My outgoing server (SMTP) requires authentication should be checked
- Use same settings as my incoming mail server should be filled
- Select the Advanced tab.
- Incoming server (POP3) port number should be 110
- This server requires an encrypted connection (SSL) should be unchecked
- Outgoing server (SMTP) port number should be 25
- Use the following type of encrypted connection should be None
- Click to close out of the Internet E-mail Settings dialog
In the Change E-mail Account dialog, click - If there was no error and you can send and receive mail, you are done.
Click then in the Change E-mail Account dialogs.

If there is still a problem, contact us and we will assist you in solving the issue.
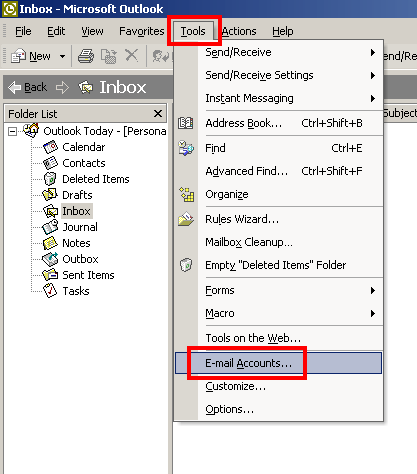
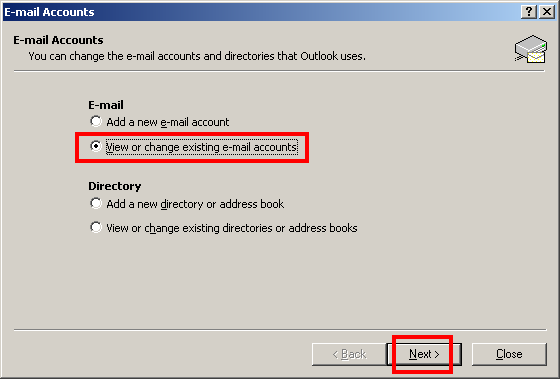
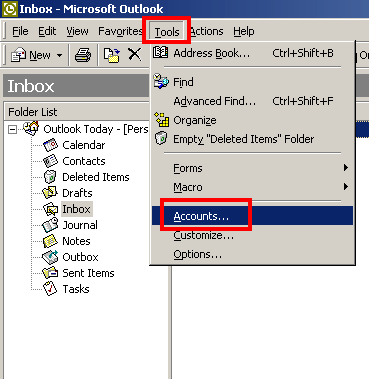
Outlook 2003
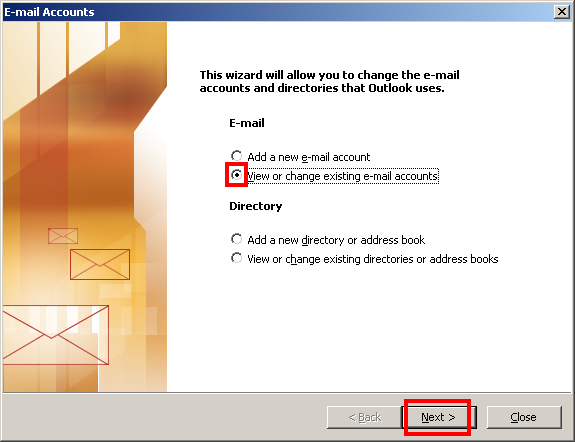
- Go to the menu and select
- Make sure View or change existing e-mail accounts is filled
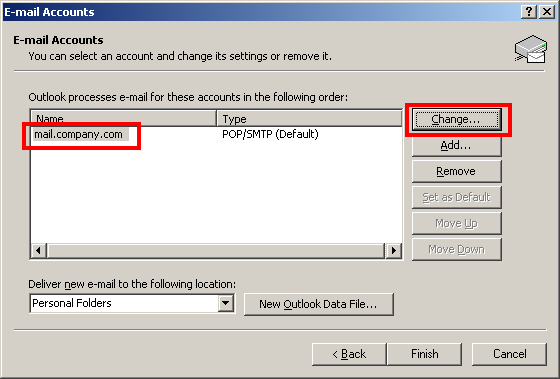
Click the button. - Select your account name then click on the button, or click if one doesn't exist
- Log on using Secure Password Authentication (SPA) should be unchecked
Click the button. - Select the Outgoing Server tab.
- My outgoing server (SMTP) requires authentication should be checked
- Use same settings as my incoming mail server should be filled
- Select the Advanced tab.
- Incoming server (POP3) port number should be 110
- This server requires an encrypted connection (SSL) should be unchecked
- Outgoing server (SMTP) port number should be 25
- This server requires an encrypted connection (SSL) should be unchecked
- Click to close out of the Internet E-mail Settings dialog
In the E-mail Accounts dialog, click - If there was no error and you can send and receive mail, you are done.
Click then in the E-mails Accounts dialog to go back to the main screen.
If there is still a problem, contact us and we will assist you in solving the issue.
Outlook 2002 / XP
- Go to the menu and select
- Make sure View or change existing e-mail accounts is filled
Click the button. - Select your account name then click on the button, or click if one doesn't exist
- Log on using Secure Password Authentication (SPA) should be unchecked
Click the button. - Select the Outgoing Server tab.
- My outgoing server (SMTP) requires authentication should be checked
- Use same settings as my incoming mail server should be filled
- Select the Advanced tab.
- Incoming server (POP3) port number should be 110
- This server requires an encrypted connection (SSL) should be unchecked
- Outgoing server (SMTP) port number should be 25
- This server requires an encrypted connection (SSL) should be unchecked
- Click to close out of the Internet E-mail Settings dialog
In the E-mail Accounts dialog, click - If there was no error and you can send and receive mail, you are done.
Click then in the E-mails Accounts dialog to go back to the main screen.

If there is still a problem, contact us and we will assist you in solving the issue.
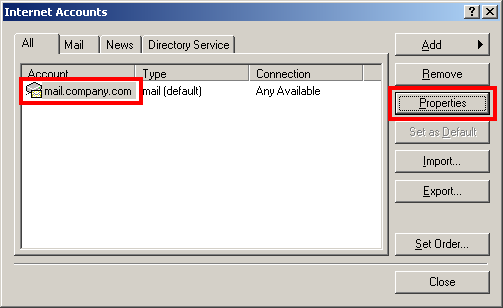
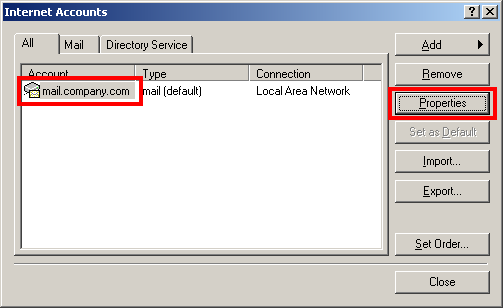
Outlook Express
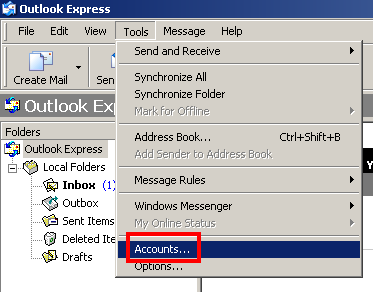
- Go to the menu and select
- Select your account name then click on the button
- Select the Servers tab.
- Log on using Secure Password Authentication should be unchecked
- My server requires authentication should be checked
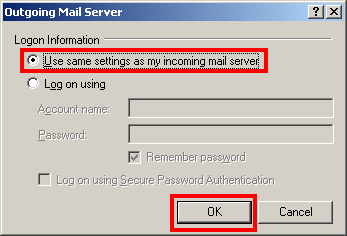
- Use same settings as my incoming mail server should be filled
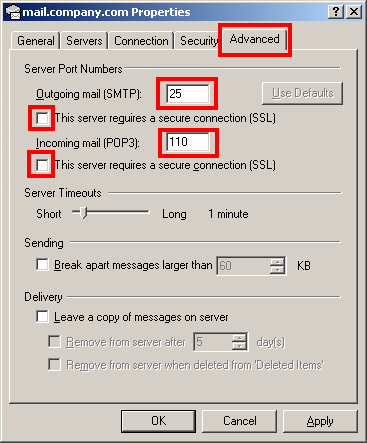
Click to close out of the Outgoing Mail Server dialog - Select the Advanced tab.
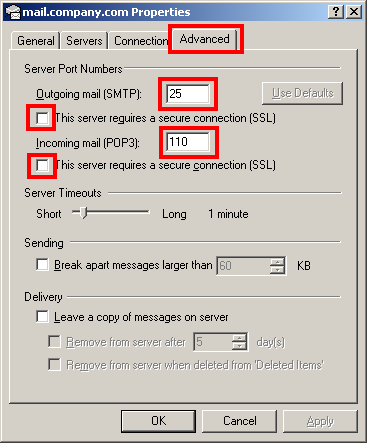
- Outgoing mail (SMTP) port number should be 25
- This server requires a secure connection (SSL) should be unchecked
- Incoming mail (POP3) port number should be 110
- This server requires a secure connection (SSL) should be unchecked
- Click to close out of the Account Properties dialog
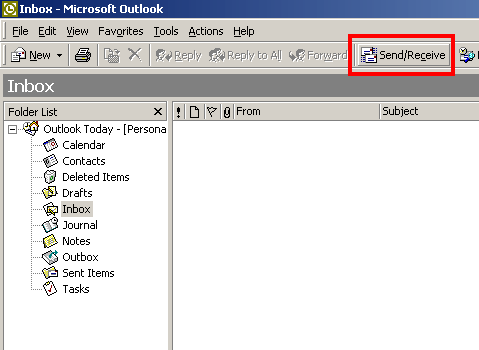
Click to close out of the Internet Accounts dialog and go back to the main screen - To test the if the changes had an effect, click the button


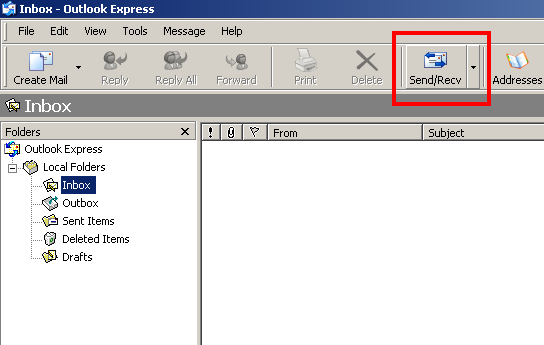
If there was no error and you can send and receive mail, you are done.
Otherwise if there is still a problem, contact us and we will assist you in solving the issue.
Outlook 2000
- Go to the menu and select
- Select your account name then click on the button
- Select the Servers tab.
- Log on using Secure Password Authentication should be unchecked
- My server requires authentication should be checked
- Use same settings as my incoming mail server should be filled
Click to close out of the Outgoing Mail Server dialog - Select the Advanced tab.
- Outgoing mail (SMTP) port number should be 25
- This server requires a secure connection (SSL) should be unchecked
- Incoming mail (POP3) port number should be 110
- This server requires a secure connection (SSL) should be unchecked
- Click to close out of the Account Properties dialog
Click to close out of the Internet Accounts dialog and go back to the main screen - To test the if the changes had an effect, click the button
If there was no error and you can send and receive mail, you are done.
Otherwise if there is still a problem, contact us and we will assist you in solving the issue.